How To Create A Gingerbread or Fairy House Out Of Glue Sticks


This came out so cute I am making them for my friends too. You don't even need much in the way of supplies. I am going to highly recommend using your large glue gun. I set up my high temp gun for this and used large All Temperature glue sticks.
Supply List, Including Optional Supplies
You will need the following list of supplies
- 20 large glue sticks, (Must, did I really have to say that? )you may need less depending on how solid you make this
- Snow Glitter (Optional, but who makes a Christmas Gingerbread house without it)
- Gingerbread Paint
- Additional optional colors of acrylic paint depending on how you want to decorate.
- light brown spray paint (Optional)
- Pam No Stick Spray (MUST)
- Aluminum Foil
- Thin Cardboard (Optional, but highly recommended)
- Candy (Optional for decorating or I will be showing you how to simulate them out of glue sticks)
- A Small red ribbon if your going to hang this on a tree. The color is really optional.
- Glitter (MUST) Hey your a crafter, you eat glitter with your Cheerios.
- Mod Podge Glossy or Matt (Must) I recommend glossy. This is Christmas and everything glitters and shines.
The Template
The Perfect Template
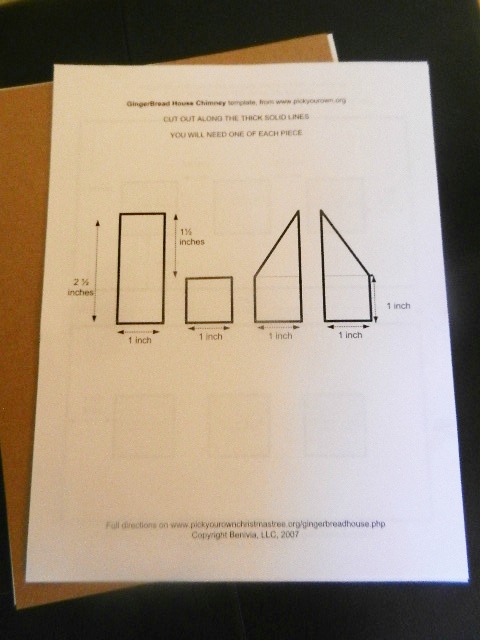
I was all ready to create my own template. If you want to then you will need some graph paper to keep your house even. Once you draw out your pieces it's easy to see your walls will fit together. I wanted to keep this house simple so I went in search of an easy template that I could just print and I found one. It's in PDF style so all you have to do is print and it comes out the exact size you want it. They did a great job with this as I have seen many templates that the roof doesn't line up well. Since I tested this Template I can say all the pieces come together perfectly.
The Template I used For This Project, Just Print
Cut Out The Template
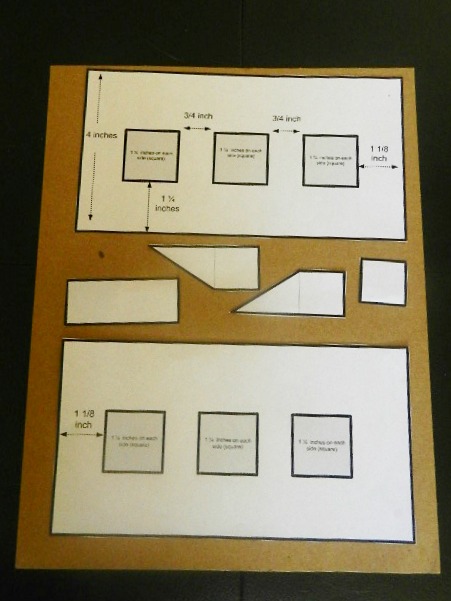
Cut out the template and glue it to the cardboard. This isn't 100% necessary, but it makes working with the template easier. You can cut up a cereal box that was going to be recycled for this. Glue it down to the cardboard with the Mod podge. You can also use glue sticks or Elmers Glue. I rubbed the end of a credit card to get out all the bubbles. Wait about an hour for it to dry.
Cut Out The Template Again
Cut the pieces out that were glued to the cardboard. You are now finished making your template and you can reuse it again and again. I just store it in a plastic zip lock bag.

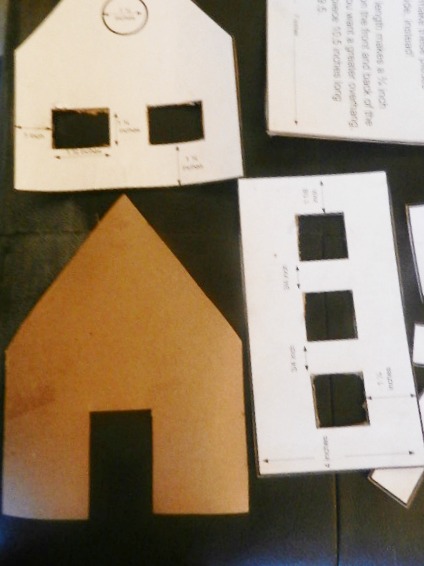
Wrap In Tinfoil
Wrap the pieces in tinfoil. You can tape it around the back or not.
Before you begin applying the hot glue you MUST spray with Pam Cooking Spray. This will ensure the glue easily pulls away from foil. Without it the glue will stick to the foil and it's almost impossible to get it off.
The Very Best Glue Gun


Apply The Glue
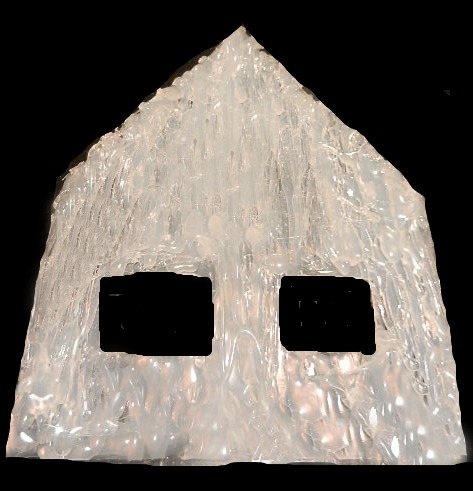
Once you begin to apply the glue you should start with an outline. This will help keep everything even and held together. After the outline move the glue gun in an up and down motion. Allow the lines to harden and dry. Your going to need to do several layers. Normally I make it about a half inch thick.
Once you are happy with the way it looks it will peel off easily from the tin foil if you used the cooking spray. The oil from the spray wipes off easily. It may take a few hours for the glue to harden to room temperature.
Repeat this process with all the pieces. They will feel soft at this point. It will become hard and stiff later on.
It Will Feel Flimsy At This Point
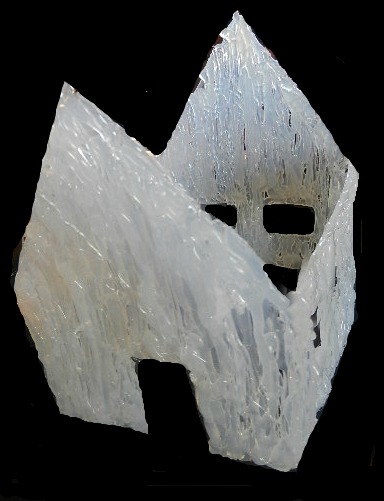
Once your pieces have hardened solid peel them from the foil and trim them so all the lines are even. This will now be a solid wall. Trim up all the pieces.
Once your trimmed Start thinking of a base. I am using styrafoam with some casting plaster applied to it. This is because my other houses have the same base. You can create a floor by tracing the house and just making a stencil of what fits, but since I am going to be putting some lights into it I don't want the floor.
I like casting plaster because I can give it peaks for the look of snow easily. I mix my casting plaster to the consistency of toothpaste or thicker. I don't follow the directions on the package. This is because I have been using casting plaster for years and know what works. I can only recommend trying it yourself and seeing what you like in the way of thickness. You can use pure snow glitter for the snow simulation, but it's expensive. I used casting plaster under the snow glitter and the effect was the same.
Putting The Pieces Together
The pieces will fit together easily. Run a line of the glue gun against the edge and press. Once the whole house is together add more glue to the edges. This will stiffen the entire piece and secure it. It will be very hard to actually pull this piece apart. It can be dropped with no damage. The walls will be slightly flexible at this point, but getting stiffer.
You may have to fill in some holes between the lines. This is easy enough and the entire project should begin to take shape. You are almost ready to decorate.
Gingerbread Acrylic Paint

Glitter Snow,

Creating Decorations With The Glue Gun
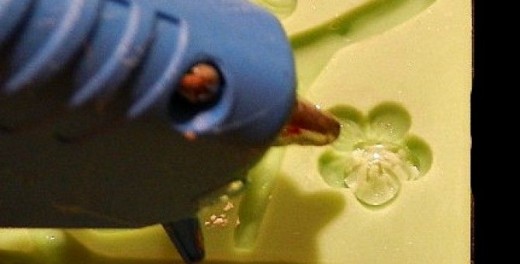
For the decorations I went back to the template and using it I was able to easily fashion some icing for the house. When they were done I peeled them off and they were the perfect size for the house. It made things very easy. A few dabs of glue and they were attached.
For the candy I just used tiny molds and just dots painted with glitter.
You Can Mold Your Decorations With Any Silicone Molds
It Gets Even Easier

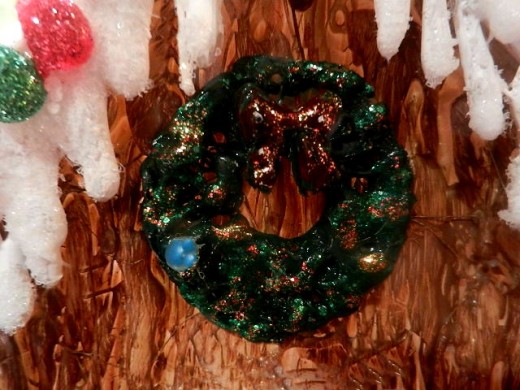
How To Make The Wreath
I created the wreath in the same manner. I filled in a donut shape in the same way I created the house. A little green paint, lots of glitter and some dots for the ornaments. Once you get started it's really hard to stop.
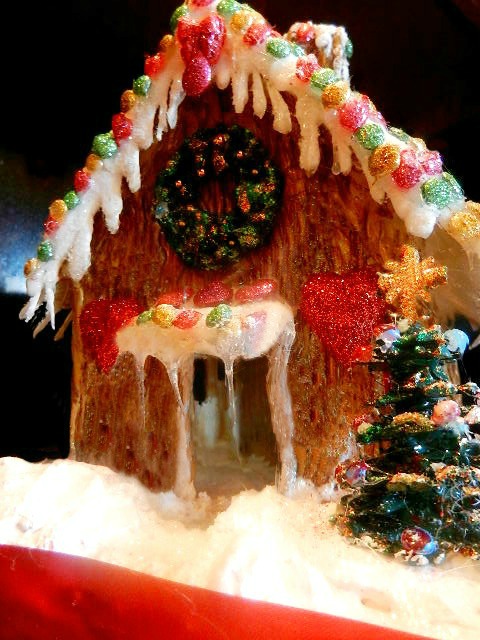
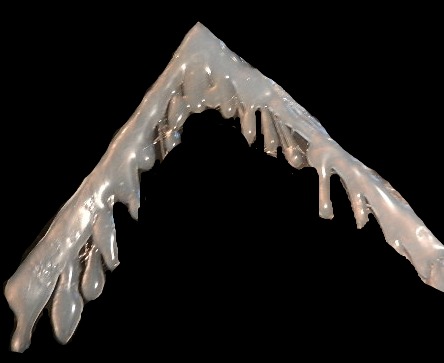
Dripping Glue Makes The Icicles
I created the icicles by allowing the glue to heat up with the nozzle and pulling it downward. Once they were created I trimmed off what didn't look good. There is no way to mess this project up. What doesn't look good is easy melted off and cut away. Here you see how I am forming the awning on the house. I added it by making a square and just attaching it so it angled downward.
A View Of The Top
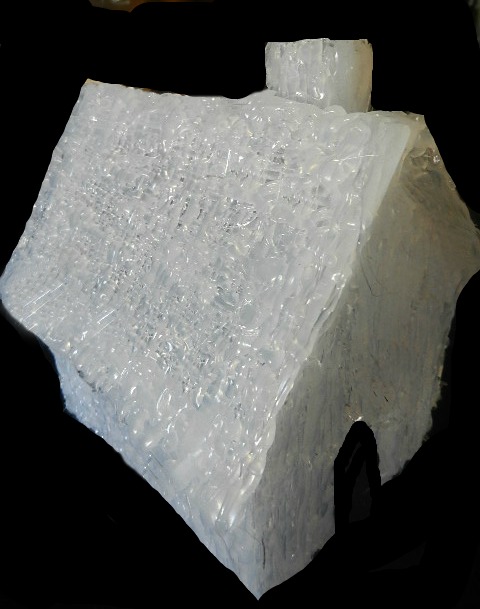
I dabbed glitter snow all around. There is no special talent needed. Just have fun and where ever you would see snow you add it. The glitter snow will add a lot of stability to the house. It dries very hard. Between the paint, Mod Podge, Glitter and Snow this house is solid. You can drop it and it wouldn't break.

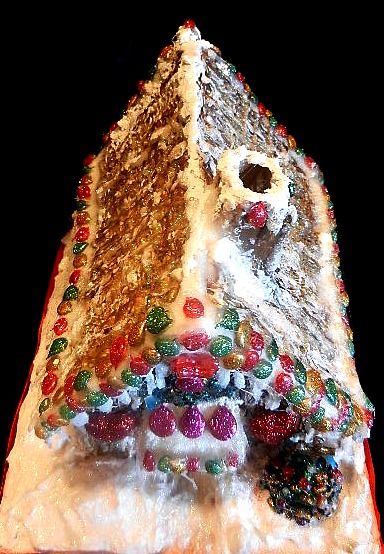
Don't Forget The Back Of The House
Don't ignore the back. This project is so odd especially when you tell people what you made it with that they are going to touch and spin it around.
If you notice one side has more white on it. This was how it looked before I trimmed it up. I eventually made both sides even. If you trim too much you just add more. If you add too much you trim it back. Everything blends and melts together nicely.

All Clean And Ready To Display
Here is the front of the house again. This time it's all trimmed and the little spider webs that the glue gun makes are all cleaned up. This is ready to display. Of course I will probably make some more trees just to give the snow some additional color and interest.


