How To Make A Baby Shower Diaper Scooter


Step By Step Instructions How To Make A Mini Diaper Scooter Cake Topper. Uses Only Newborn Diapers
You have seen the large version of the Diaper Scooter, but this is the mini version. It uses only 10 diapers and can be used as a centerpiece, gift or as a topper on a larger diaper cake.
You will need the following :
10 newborn disposable Diapers
1 Burp Cloth
1 Pair Newborn Socks
2 Baby Wash Cloths
2 pacifiers
1 baby bottle
1 baby bib
Aluminum Craft Wire 12 Gauge (This is the key to the mini version as you won't have the bulk of the cloth to hold up the handle bars)
Curling ribbon and decorating items as per your individual taste.
Photo Credit : Rockinpicks.com All photos are property of Rockinpicks.com. You may not use them unless this article is linked with full credit. No blogger reposts please. You may make copies for personal use only.
Creating The Front End Of The Scooter - Step 1
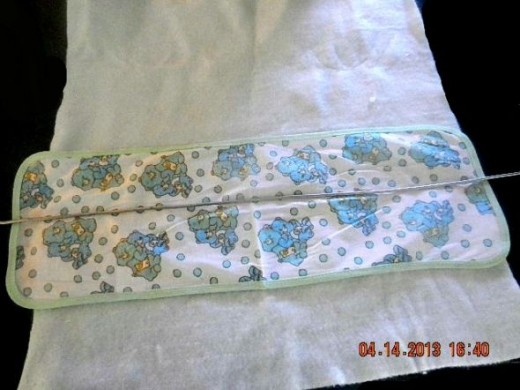
Take the burping cloth and measure the wire so it extends 2-2.5 inches on both ends.
Aluminum Craft Wire 12 Gauge
Aluminum craft wire is amazing stuff. It's thick yet bends easily and holds it's shape. It's great for this project or if you are molding clay around it. A lot of people who sculpt use it to create the frames for figurines. It cuts easily with a normal jewelry wire cutter or even a scissor. If using a scissor score the metal and then just bend back and forth on the score. It should break apart easily.

Create The Handle Bars - Step 2
Roll the burping cloth around the wire. Burping cloths are smaller than receiving blankets and light weight. They are close in size to a cloth diaper, but slightly smaller. They are usually long enough to fit over the shoulder and used to protect clothing from baby spit up.

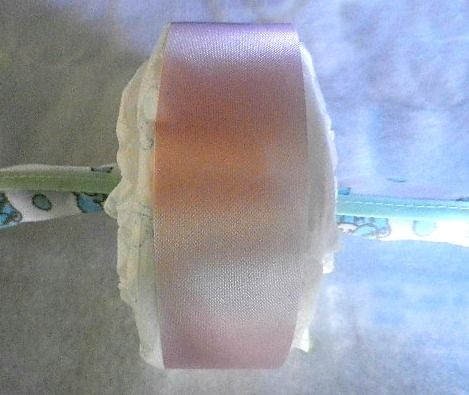
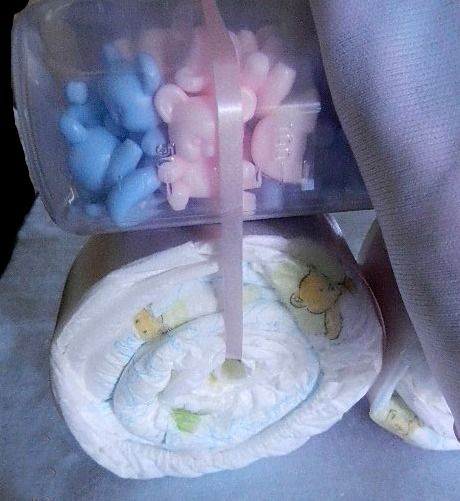
Add The Front Wheel - Step 3
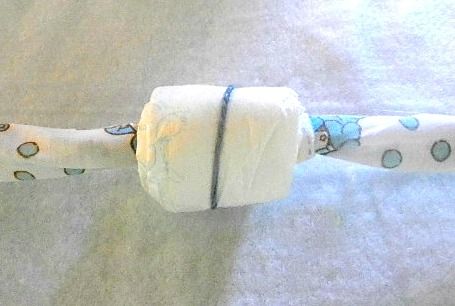
Open up one diaper and fold it in half going the long way. Place one end in the middle of the wire wrapped burp rag and roll. Once you get to the end place a rubber band around it to hold it snug. Open up a second diaper and continue rolling from where the first one ended. Do this 4 times.
Keep The Edges Even - Step 4
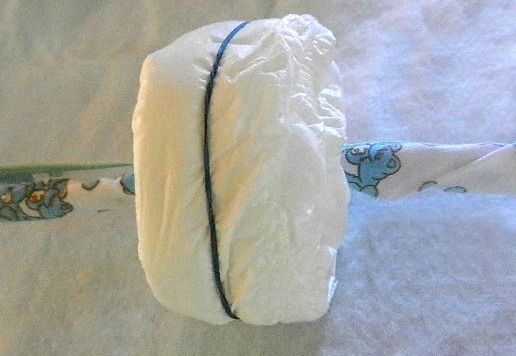
Adjust the diapers so they are flat and even on the sides. Hold them tight with a rubber band.
Boon Pod Bath Toy Scoop - Every New Mother Needs A Bath Scoop
What a brilliant idea. It's a toy scoop as well as a toy. Keep your babies toys clean and dry between baths with this toy scoop.
Replace The Rubber Band - Step 5
Replace the rubber bands with ribbon. Use a little hot glue and attach the two ends of the ribbon. Don't get hot glue on the diapers. This will hold the wheel and you can remove the rubber band.
Diaper Cakes On Ebay.
If you have no time to make your own, try these.
Bend The Wire Up - Step 6
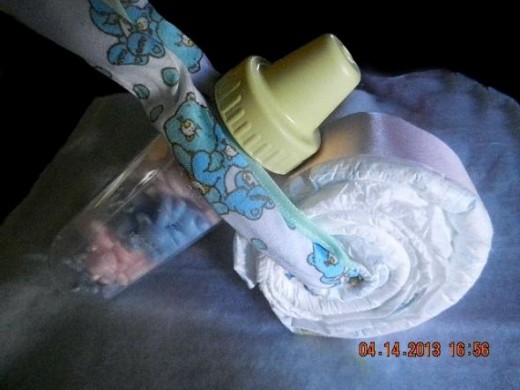
Bend the wire up and around the neck of a baby bottle. You can fill the bottle with little baby items.
Receiving Blankets - You Will Need These For The Diaper Cake Itself
New Mom's never have enough receiving blankets. Babies like to be snuggled or bunted securely. It reminds them of the womb and keeps them from being overly fussy. One too large for bunting the blankets are great for laying down on surfaces for diaper changes. I never had enough of them even after having 3 children.


Press The Wire Outward - Step 7
Press the wire back and tie them together with a small piece of wire. The bottle should hold snuggly with no need for any adhesive.
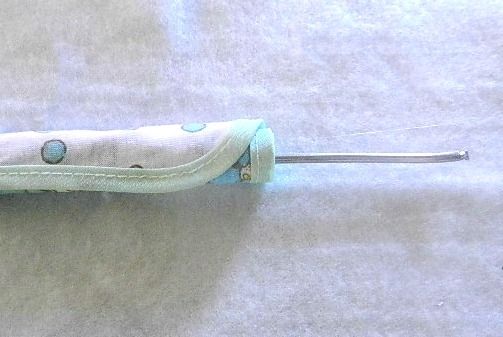
Bend The Ends - Step 8
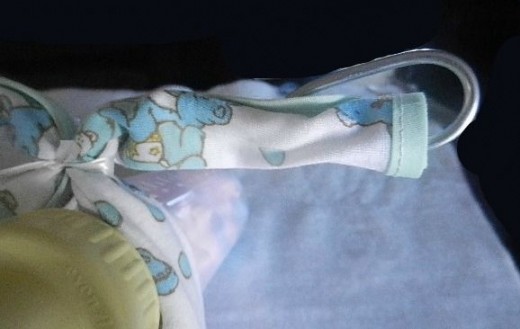
Bend the ends upward and form a loop. Don't press the wire into the end so there is no chance of puncturing the burping bib
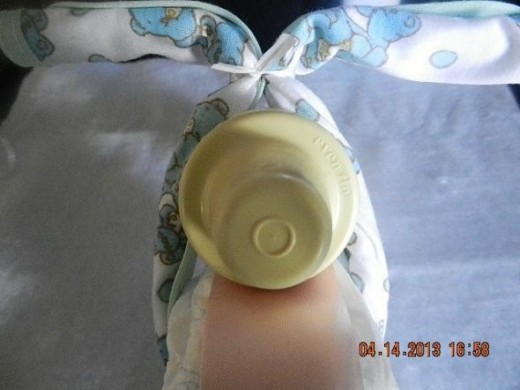
Finish The Handle Bars - Step 9
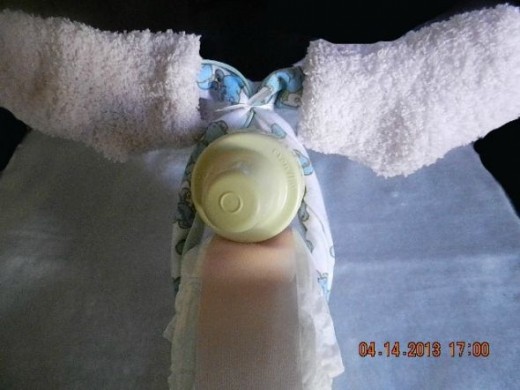
Finish the handle bars off with a pair of baby socks.
Add Some Curling Ribbon - Step 10
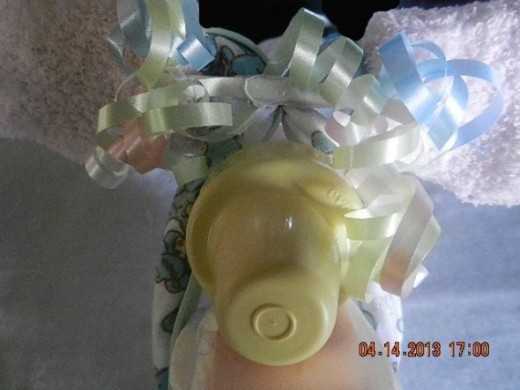
Add a few pieces of curling ribbon to the middle so that the first ribbon is covered. Use a small piece of the curling ribbon to tie it onto the hand bars through the ribbon you used to tie the handle bars together.
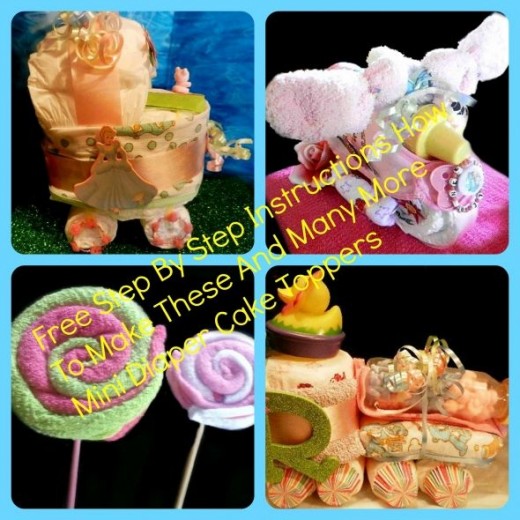
If You Liked This Diaper Cake Topper And Want To See More
Creating The Back Half Of The Scooter
At this point put the front half to the side. We will start the back half.
The Back Wheel - You Will Need 5 Diapers And Some Curling Ribbon
Form the back wheel the same way you did the front wheel, but put some curling ribbon in the middle instead of the burping cloth wrapped wire. The ribbon should be around 12 inches long. You will then tie it around the back end of the baby bottle. I sometimes put a little hot glue on the ribbon to hold it down on the bottle. The hot glue lifts up from the plastic bottle easily. It doesn't hold a permanent bond. A low temp glue gun will not damage the baby bottle plastic.
How To Create The Foot Bar - You Will Need 2
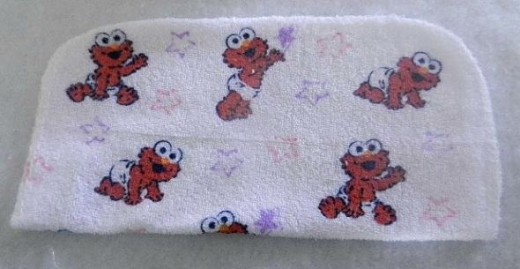
Fold a baby washcloth in half.
Fold The Top
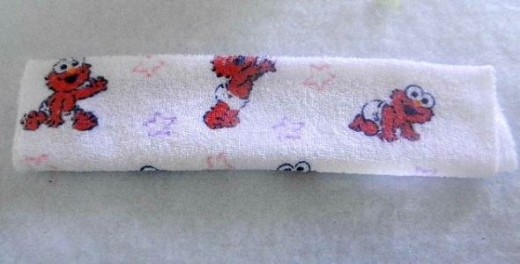
Fold the top down and the bottom up so it's cut in thirds.
Fold In the Sides

Fold the edges inward
Measure Between The Wheels - You need 2
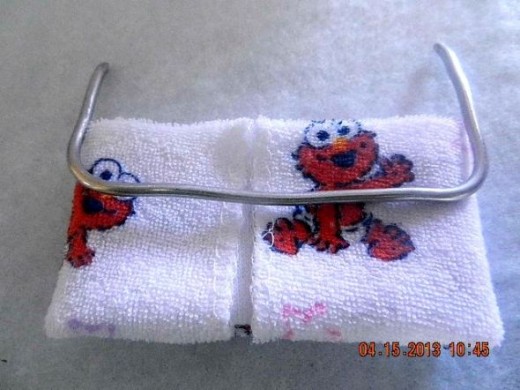
From the middle of the first wheel to the middle of the second wheel measure that space and add 2 inches. Cut two pieces of wire the same size and fold in one inch on each side. The wire should slide easily into the middle of the wheels. Do this for both sides of the Cycle.
Attach Using Curling Ribbon
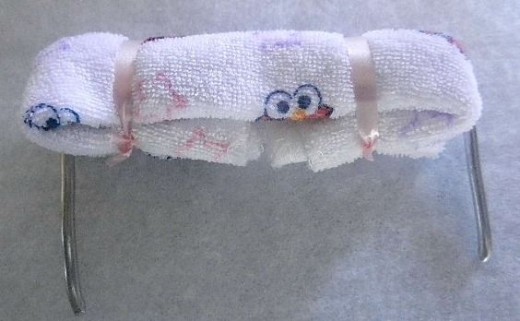
Cover the wire and tie with curling ribbon. Slip the wire into the holes in the middle of the wheels. It should slide in easily.
The Body Is Done - Decorate
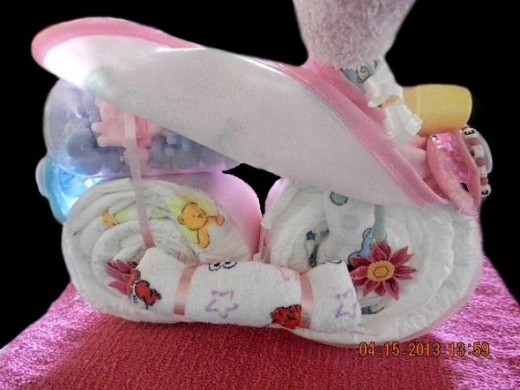
Now starts the best part. Make the scooter yours by decorating. I added a pacifier to the front and the back. Another thing a lot of people do is have a stuffed animal riding it. Keep in mind the size and make sure the stuffed animal is to scale.
Cover the seat area with a newborn bib.
The Scooter Is Finished - The New Mom Will Love It
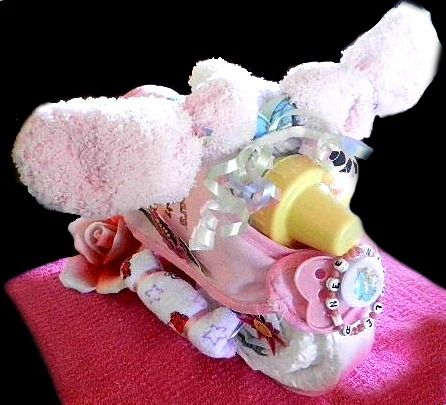
Use the scooter on top of a diaper cake or just the way it is as a table decoration. You can make 4 of them with one box of 42 newborn diapers.
Step By Step Instruction On How To Make A Mini Diaper Stroller - One Pack Of Diapers Makes 4 Different Miniature Shower Decorations
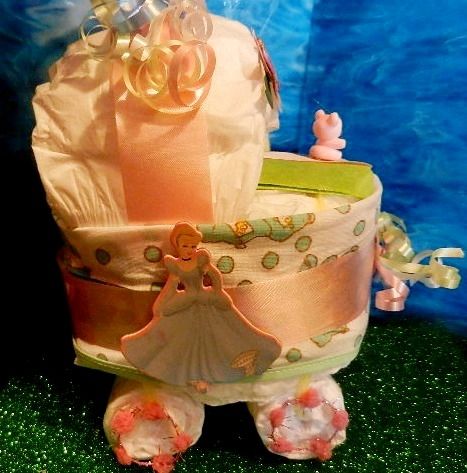
If you liked the Motorcycle you will certainly like the Baby Carriage. Here are the step by step instructions.


